It's day 3 of Teacher Week '13 and it's almost time to teach! This is always such an exciting, yet stressful, time of the year for me. I'm linking up with Blog Hoppin' for a fun week of sharing. Be sure to check it out.
I have been working like crazy setting up my new classroom. Here's a little sneak peek...
If you missed my previous post with pictures from my classroom last year, you can check it out here.
Drumroll for my 'Organizing for Instruction' tip...I am a total label junkie (ok, so that was my tip, but it's coming)! They make everything look so clean and neat and with 60 kids they save me oodles of time. I print an entire sheet of address labels for each student. This saves me so much time and saves me from having to look at my handwriting all over the classroom, yeah, it's that bad! I use labels for student craftivities that I hang up, student pictures for class graphs and venn diagrams, labeling student files, take home book bags, homework activity envelopes, homework folders, writing folders, math journals, etc. I still use *cute* larger labels for folders and journals then simply stick the name label underneath (I'm feeling a bit bummed that I have never taken pictures of any of this, but I WILL be better this year).
I also then don't have to stress about printing out all of my labeling materials each time I get a new student. I simply make extra at the beginning of the year then when a new student joins our class, I only worry about printing one sheet of labels for him/her. I prefer having one sheet for each student versus one sheet for the class because then when a student moves, his/her name label is now on every page (which gets tricky when I have a parent helper help with labeling items and he/she doesn't know which students are no longer with us), and if I get a new student, he or she isn't on the label sheets I have printed and ready to go.
I buy these in bulk at Costco.
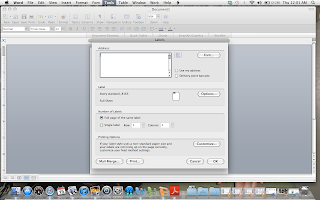
To find the template in Microsoft Word, click 'Tools' and look for 'Labels' in the drop down menu.
When the pop-up window opens, click 'Options' if the template you need isn't the one that is showing.
If you are using Avery address labels, you need Avery 5160 (as stated in the top and bottom corner on the label box). Search for the desired label in the new drop down menu.
Click the label template you need then click 'Ok'. The template will then show up in a new Microsoft Word window. Type in student names and you are good-to-go!
I hope this tip helps you 'organize for instruction', too!
Head on over to Blog Hoppin' to see what other tips you can find!


No comments:
Post a Comment